In Colour

In Colour
2022 - 2024

Tuesday 22 November 2011

Works of the workshops

At a couple of workshops I recently run, I decided to include projects using the Big Shot, Christmas, & something I had learnt at regionals (Melbourne 2011).
This little Pillow box is Wild Wasabi card stock, with Wild Wasabi ink brayered onto the  Hounds Tooth embossing folder, before running it through the big shot (ok that bit wasn't new, but the next bit was).
The ribbon flowers were show on stage by Miriam Spiess, along with lots of other great ideas.
Punch out a circle (or I used the fancy flower punch), cover it with sticky sheet, then stick the ribbon down working from the outside into the centre, ruffling it as you go. & add a pretty brad.


These were the make & take projects. I tried to keep the colours & stamp sets to a minimum, so that it's easier for the guests to recreate at home. But of course I still have to add somethings in for fun.
Colours: Wild Wasabi & Whisper White. Stamp sets: Welcome Christmas & music notes.

The hostess already had an Idea Book & Catalogue, so I made this little set of 3" christmas cards, & Tote as her gift.
I used the current christmas dsp & the same stamp set that we used for the make & takes.

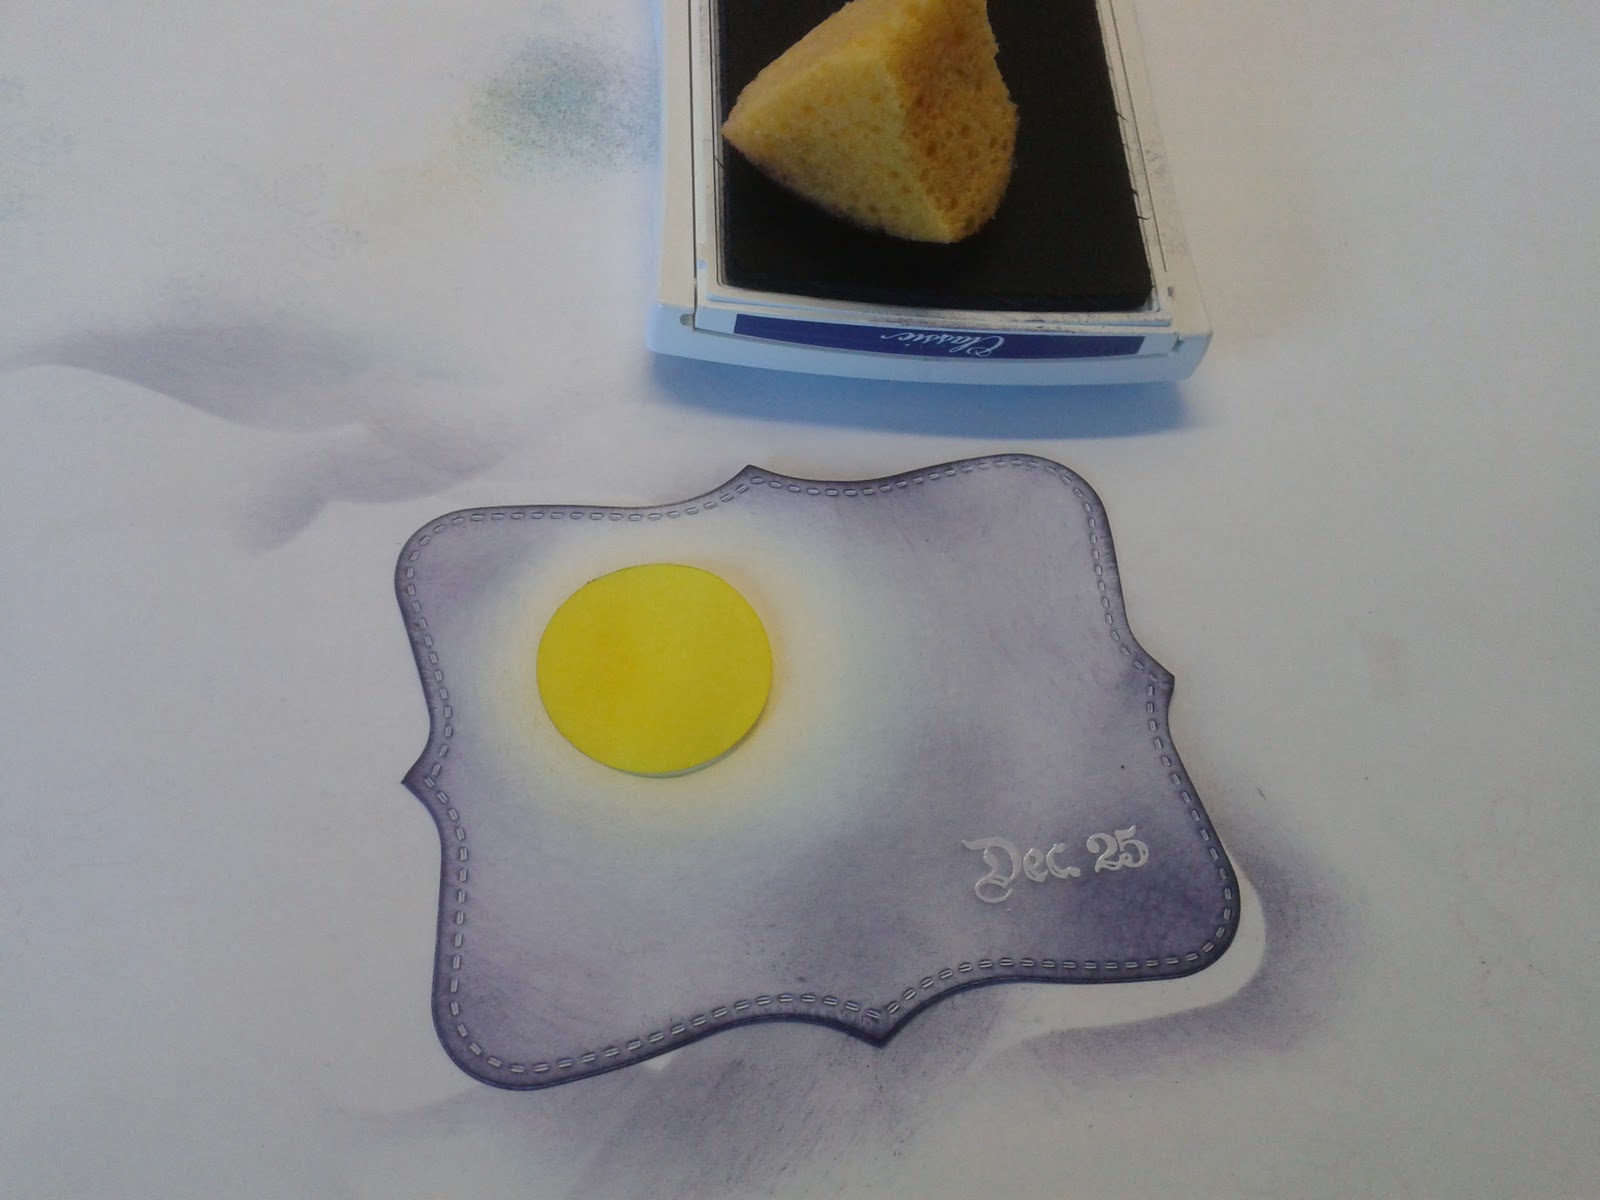
 Faux photo tinting technique: This card was part of a colouring class.
Winter Post & Lovely as a Tree.

Retro-Vintage Tea Card

I made this birthday card for my friend Shari, who loves to drink tea, (especially T2 tea).
You may not be able to see from the photo, but the tea stream is linen thread, with crystal effects over it.

This is just to show a bit of the inside which I actually stamped (because I often don't bother),  but the stack of cups is stamped in Poppy Parade, & some bits are coloured-in with the Versa-mark marker.

Sunday 13 November 2011

More swaps for Melbourne

I can't seem to make just one design of swaps, so I made a couple of designs, then just changed the colours once...or twice.
Antique Aqua
Colours: Pool Party, Crumb Cake & Very Vanilla. Stamp set: Delicate Doilies & Tagtastic.

Cherries & Cream
Colours: Cherry Cobbler, Early Espresso & Very Vanilla. Stamp sets: Tagtasic & Elements of Style.

Crumb Cake & Cream
Colours: Crumb Cake, Soft Suede & Very Vanilla. Stamp sets: Tagtastic & Elements of Style.
All projects contain, Seem Binding Ribbon, Vintage Wallpaper Embossing Folder, Decorative Label Punch, Lace Ribbon Border Punch & White Frost or Champagne Mist Shimmer Paint (spritzed).

Inky Night Sky

One of the swaps I made for the Melbourne Regional event was this christmas, post-card style, top note.
I thought I'd share a basic step-by-step, photo tutorial, so that everyone can try their hand at a glowing moon, on christmas eve (since the time is approaching).


If you have a big shot, roll through some whisper white card stock & the top note die.
If you don't have a big shot you could use a stencil to trace & cut a top note shape, or a rectangle will do the  job too.

Use the embossing buddy to prepare the card stock before stamping.
(This helps with static & stops the embossing powder from sticking were you don't want it)

I used the Versa-mark marker, to ink only the "Dec 25" from this stamp (from Winter Post stamp set), because I didn't want the whole label, but the Dec 25, matches the font from the post card stamp.

Stamp firmly onto the bottom corner of the top note.

Sprinkle with clear embossing powder.

Tip off embossing powder, & tap or flick top note to remove any excess.

Use a heat tool to set the embossing powder.

Punch out a 1 3/8' circle from a post-it note. (be sure to punch over the sticky area  of the post-it so it will stick to the top note, & stay in place while sponging).

Choose where you would like the moon to be, & stick down the circle.

Starting with yellow (I used Daffodil Delight), apply ink lightly to sponge (remember you can always add more).
Starting on the post-it circle, sweep sponge around the moon in gentle circles, then working you way out into bigger circles as the ink runs out. 

Next colour, blue (Marina Mist), goes around the yellow. Because you can't start on the post-it circle , you need to tap off the excess ink onto scrap paper before applying it around the moon ( this helps to keep the ink looking soft).

Again use a gentle sweeping circle motion around the moon, but start just outside the yellow then work your way in,  letting the blue ink fade out as you slightly overlap with the yellow.

Last colour, purple/indigo ( Concord Crush ). I like to go around the edges first  sweeping the ink downwards.

Start filling in the rest of the top note lightly with the purple ink, using small circular motion around the edges & corners. Then without re-inking the sponge, use the large circle movement to work the purple ink around the moon, in towards the blue. 

Then you can go back & add more purple ink to darken the edges, using small circular motions.

Remove the circle post-it before stamping.

I think this is a Fir tree, from the lovely as a Tree stamp set, & makes an excellent christmas tree.
Ink up the tree stamp with the purple ink, then stamp it a few of times  before re-inking, you don't want all the tree's to look the same, so stamp at different heights as well.

Keep stamping the trees until your happy with the result. (I was aiming for a christmasy forest).

Stamp the Post Card stamp form Winter Post, in the purple ink.

Remove any excess ink from the clear embossed Dec 25, with a tissue. 

All done. A big glowing moon, in an inky night sky, over a forest of christmas trees.

A Blue alternative (Night of Navy).

Stampin' Markers are great if you only want to ink-up a portion of a stamp. 

Wednesday 5 October 2011

Lace Ribbon Border Punch

When I received the Tagtastic (Hostess) stamp set, I really liked the "just for you" stamp. I just had to have play with it and found it worked well with the Lace Ribbon Border Punch. Here are a few samples I've managed to make so far. They all contain: Lace Ribbon Border Punch, Early Espresso & the Just for You stamp.
Colours: Soft Ssuede, Cherry Cobler, Whisper White, Early Espresso.
Stamps sets: Tagtastic, Delicate Doilies.

Colours: Early Espresso, Very Vanilla  & Crumb Cake Cs + Ribbon.
Stamp sets: Tagtastic & Creative Elements.

Colours: Early Espresso & Whisper White CS + Ribbon.
Tagtastic stamp set & Polker Dots Embossing Folder.

Colours: So Saffron, Early Espresso & Very Vanilla CS + Ribbon + Pearls.
Stamp sets: Creative Elements & Tagtastic. + Elegant Lines Embossing Folder.

Saturday 17 September 2011

Brayed Sky Lines

I've been playing with my new stamp set Forever Young (which I love), & found the brayer is a fantastic tool to use with this stamp set. So I thought why share a few tips of how I used the brayer to acheive some of these great effects.
Stamp set: Forever Young. Avaliable in wood mount $50.95 & Clear mount $40.95.

Basic Suppies: Stamp set, Brayer, Sponges, Ink pads: More Mustard, So Saffron, Marina Mist & Black,
Coloured Card stock & Glossy white Card stock, & Scrap paper.

1. Fold card base in half & crease with bone folder.

2. Ink the end of the brayer with So Saffron (approx 1").

3. Roll onto the bottom edge of the glossy white card stock. Try to keep rolling in just one direction to avoid making marks. Also try to drag the ink upward just slightly by moving the brayer up just a tiny bit each time you roll across the card stock. 

4. Re-apply the same amount of So Saffron ink to the brayer, then add a very small amount of More Mustard ink
(approx 1/4") to the very end of the brayer.

5. Roll ink onto the same area of glossy card stock that you've already inked.
This just adds intensity of colour & depth.
(The photo's gone sideways, but the yellows actually the bottom).

6. Ink up the other end of the brayer with Marina Mist, approx 1 1/2" or 2".

7. Apply the blue ink to the top edge of the glossy card stock in the same way as you applied the yellow ink. Try to drag the colour down this time, but not all the way, if the blue & yellow over lap it may turn green.
(I apologise for my photo turing side ways again) 

8. Re-ink the brayer with Marina Mist again, but a slightly small amount this time.

9. Add the Marina Mist to same area of glossy card stock as before.
But just trying to drag the blue ink down as far as possible without quite meeting the yellow.
(Allow the coloured ink to dry on the glossy card stock before stamping,
this helps to prevent the image from bleeding or going fuzzy).

10. Ink the tree image with a black ink (I used stazon in the other projects), and press firmly in the middle of the block when stamping, (try to be careful not to smudge the image as glossy card stock can be slippery).
If the card stock sticks to the stamp, peel it off gently to avoid smudging.

11. Touch up any areas of the image that have been missed, with a black stampin' marker.
(this ink may stay wet longer, blot onto clean scrap paper to help dry).

12. Cut corners off glossy card stock with a corner rounder punch.

13. Stick stamped Glossy card stock onto Black card stock back ground.

14. Stamp the tree image onto wide stripe of So Saffron, card stock in More Mustard, Ink to create a back ground.

15. Sponge the edges of the So Saffron card stock with More Mustard ink.

16. Sponge the edges of the Marina Mist card stock base, with matchig Marina Mist ink,
then stamp words or greeting in the bottom corner.

17. Stick the So Saffron back ground strip & thin More Mustard stips of card stock to the base of the card.

18. Use some dimensionals to stick the main image to the card.

19. All done. & there you have a golden sun set approching the horizon, with a golden leafy tree back ground. 

Another golden afternoon.

Forever & a frame.

Sun Showers
Baja Breeze (blue) & the pendulum from the clock.