In Colour

In Colour
2022 - 2024

Saturday 29 December 2012

Sassy Sparkling Snowflake card (step by step)

I came across a card very similar to this while googling images, and thought it was so nice must make one of my own. Of course every time I've tried to recreate something it always turns out a little bit different. I'm sorry that I can't give proper credit where credit is due. I did go looking for the original image that I found which had inspired me to make this card, however I could not find it again, therefore I can not tell you the name of the original creator. But the card was gorgeous, it was mostly white & had a champagne glimmer snowflake. So here is my take with silver & red.
Stamp set- Sassy Salutations, Embossing folder- Northern Flurry, Die- Snow Flurry
Colours- Whisper White, Real Red & Silver Glimmer paper.

The "Merry Christmas" is shiny because I've embossed it with clear embossing powder.

1. Ink up the greeting with Versa Mark ink.

2. Then dip into Real Red ink, & stamp onto whisper white card stock.

3. Sprinkle with clear embossing powder, & remove excess.

4. Use a heat tool to set the embossing powder.

The "Merry Christmas" is a nice shiny red at the bottom end of my whisper white card stock.

5. Place the card stock into the Northern Flurry Embossing  Folder,  trying not to cover the greeting with the image, but having as much of the image land on the top end of the card stock as possible.

6. Run it through the Big Shot (in the appropriate sandwich order).

The snowflakes ended up pretty close to the greeting, but didn't actually go over it. So I'm happy with that.

7. I cut my silver glimmer paper to size, then tried to cut out two snowflakes from the Snow flurry die. The idea is to waste less by using the rectangle portion as part of the background layer.

I accidentally cut this snowflake too close to the edge of my silver glimmer paper, so I needed to  repair it by cutting another piece of the snowflake to fit back in & fill the gap.
(  I apologize for some of these photos ending up sideways & up-side down )

 Once the card is put together you don't even notice, because the sparkle hides the puzzle piece look.

8. I used a glue dot to hold the repaired piece in place as I attached the sliver glimmer paper to the whisper white card stock. Then stuck the to a Real Red card base. (Glue dots are useful when  sticking pieces to glimmer paper).

9. I used glue dots to stick my snowflake together, then more glue dots to stick the snowflake to the card.

It just needs something to finish of the snowflake. (& I bet  you can't even see where my repair job ended up)

10. I thought a bit more red was need for the centre of the snowflake, & had Real Red 1/8" Taffeta Ribbon, & Ribbon  Sliders. I went with the one from my old Hodgepodge Hardware, put the ribbon through it then tied a little bow.

11. I used more glue dots to stick the ribbon & hardware to the snowflake.

All done. Shimmery & Shiny.

The Photo really doesn't do it justice. It looks much nicer in real life.
(That could be something to do with my poor photography skills & using my phone as a camera) : D

A white version. I used Naturals White card stock & a White Button.
Stamp set- Curly Cute.

I stamped the "Seasons Greetings" in Versa Mark, the Sahara Sand & embossed with Iridescent  Ice Embossing Powder.

Sunday 23 December 2012

Teachers gifts using Snowflake Soiree

When it comes to teachers gifts I like to keep the cost down, but I still like to give them something nice. That's why homemade gifts can be good, if you have the time and ideas.
I seen christmas bark (or peppermint bark if you like)  on pinterest and thought what a great idea, I can do that, I'll just have to make it look pretty, then I'll have some nice little teachers gifts. 
The Christmas Bark is just a layer of dark chocolate with a layer of white on top with crushed candy canes...mmm. Break up the Christmas Bark, put it into a cello bag with some nice ribbon & a pretty tag.

Remember to use good quality eating chocolate so that it will taste delicious. Cooking chocolate is more of a compound chocolate, and doesn't have the same eating quality.

I made each of the tags to match the cards. The tags are all punched with the small & large Tag punches, stamped with snowflakes from Snowflake Soiree and "Very Merry"from Short & Sweet.

Colours- Crumb Cake, Night of Navy & Very Vanilla.

Colours- Midnight Muse, Marina Mist & Whisper White.
The snowflakes are stamped with Versa Mark & embossed with Clear embossing powder.

Colours- Raspberry Ripple, Baja Breeze, Whisper White.
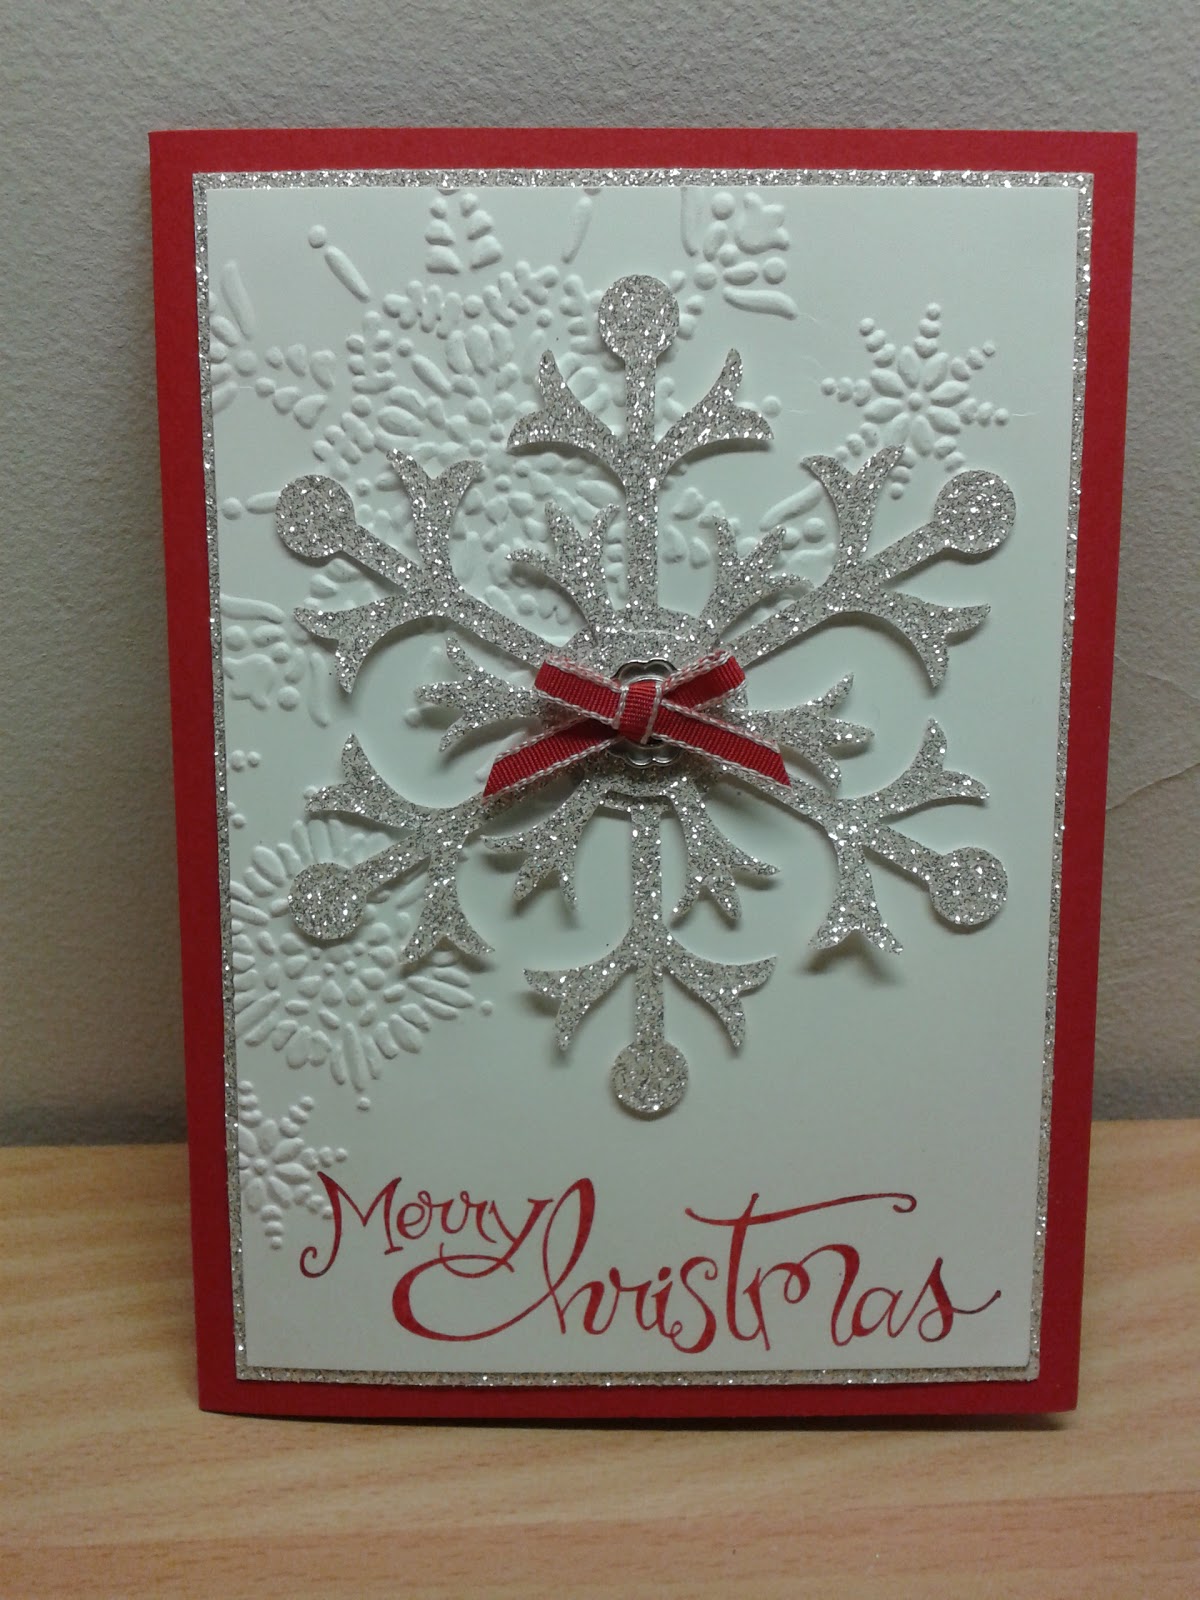
You can't tell in the photo, but this card has been spritzed with White Frost Shimmer Paint.
The "Merry Christmas" is from the Sassy Salutations stamp set.

Colours- Gumball Green & Whisper White. 

 The snowflakes have been stamped with Versa Mark & embossed with Iridescent Ice embossing powder.

 The rest were not part of the teachers gifts, but just the samples I've made with the Snowflake Soiree stamp set. I love it & wish I had gotten it sooner.

Colours- Crumb Cake, Early Espresso & Very Vanilla.
Framelits- Apothecary Accents
Die- Snow Flurry
Tulle- Early Espresso

Colours- Island Indigo, Pool Party & Whisper White.
Framelits- Labels Collection.

These snowflakes are also embossed with Iridescent Ice.

Colours- Wisteria Wonder, Concord Crush & Whisper White.
Punch- Decorative Label.

More Iridescent Ice.

Sunday 16 December 2012

Springy Thingy Card & Christmas Favor Box

These are some christmas projects I've recently done in a workshop. I decided to keep the theme with the Cherry Cobbler red & the window from the Cottage Window Stamp set. I had never made one of these cards before, but a customer asked if we could make one in a workshop. I had trouble finding inspiration for the "Springy Thingy"card when I googled it, so I figured it probably hasn't been done much. So here is my sample of the springy thing card. 
Stamp sets: Cottage Window, Jolly Jingles & Scentsational Seasons. Woodgrain Embossing folder, Fancy Favor  Bigz Die & Scallop Edge Border Punch.

I used acetate to make the window in the Fancy Favor box, & hoped it would look like a gingerbread man in a gingerbread house.

I used the Jolly Jingles wheel to stamp the background, & stamped the little snowflake stamp from the cottage window stamp set over the window & a little bit on the card base in the background.

I sponged lightly with So Saffron to make it look like a warm light inside the window. The bird is coloured in with blender pens & ink. & I coloured in the holly & the window straight from the markers. 

The Springy Thingy card with the belt off.

The Springy thingy card opened up.
I forgot to take a photo of the card with the white square of card stock that I added to the centre of the card to write on.

This maybe a little hard to see, that's because it was photocopied from a magazine, then scanned onto the computer.
I hope it is readable enough to follow or print, for anyone who wants to have a go at this card.