Stamp sets: Picture Perfect, Balloon Celebration & Hardwood
Cardstock: Crumb Cake, Basic Black & Whisper White
Ink: Soft Suede, Black Memento, Pool Party, Tempting Turquoise, Pacific Point, Blushing Bride, Peekaboo Peach, Flirty Flamingo, Sweet Sugarplum, Calypso Coral, Mint Macaron, Cucumber Crush & Bermuda Bay
Scroll down to bottom for more colours options & measurements.
It works like a gate fold card at the front opening, then tucks into an embellishment on dimensionals. (At least this is what works for me, you could also use a belt or ribbon to secure the card closed)
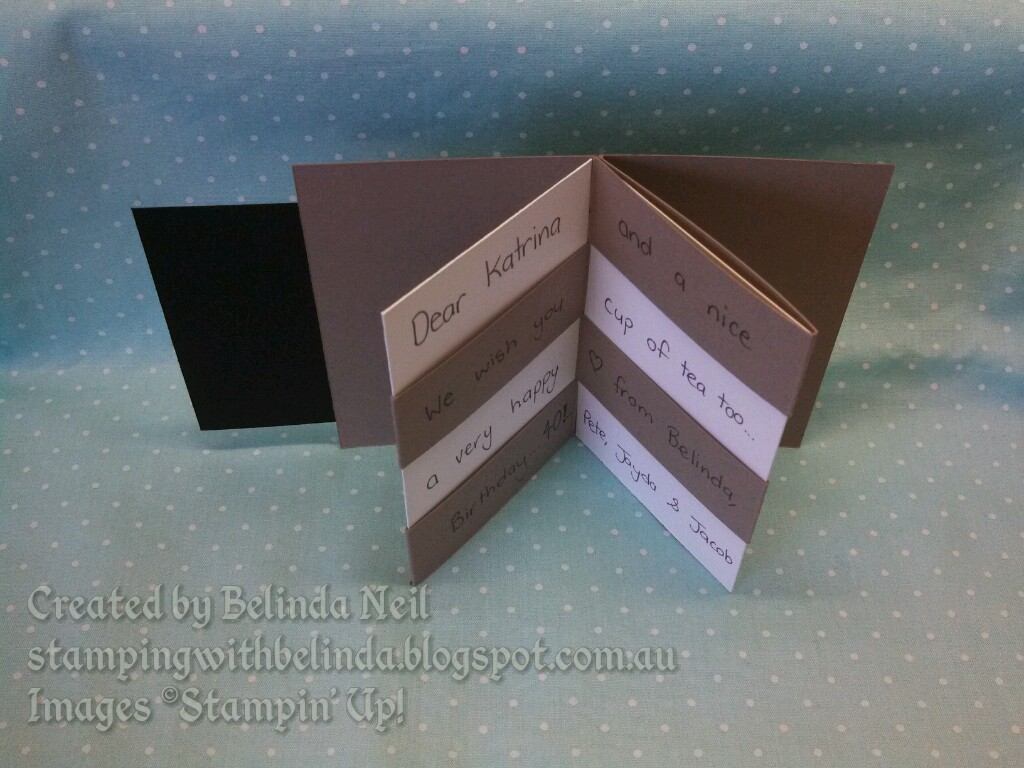
When the card is open it reveals a message on the inside.
Then when you bring the two mountains together (by folding the middle in half backward)...
You can open the centre the other way to reveal the hidden message.
This card is really cool. Everyone in the class was very impressed by how fun this card was to play with, yet how easy it was to make.
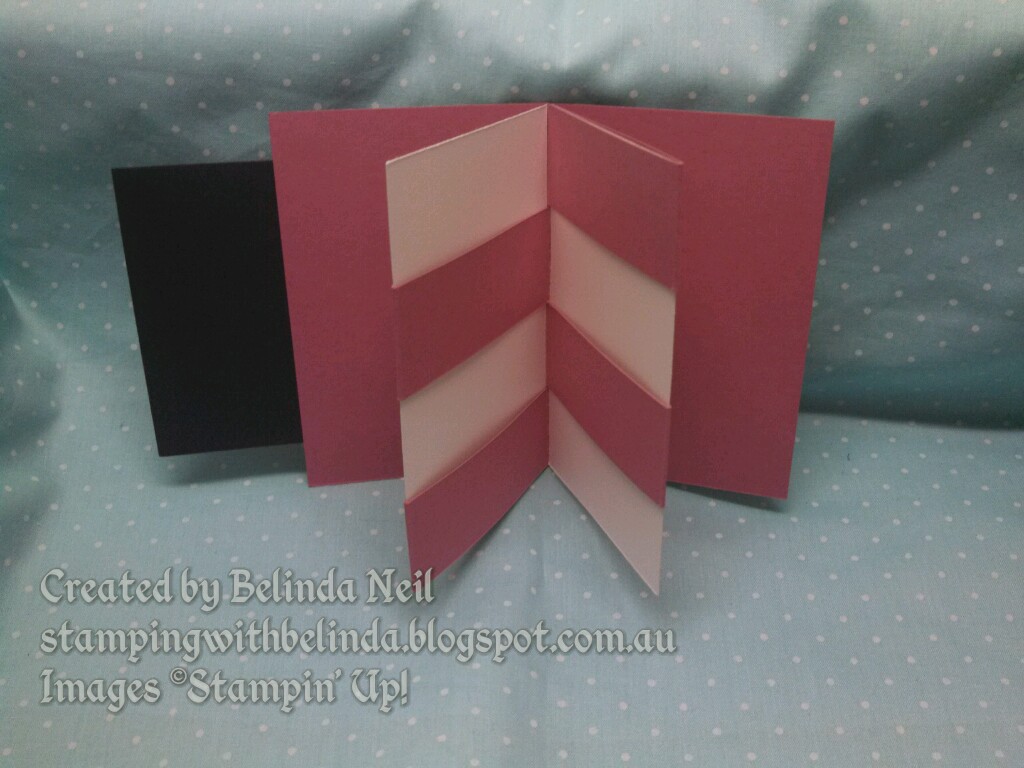
This next card was made the same way, but with different sizing. I just played around with measurements, so I think it could be made to suit individual needs.
Stamp Sets: Picture Perfect, Kinda Eclectic & Endless Birthday Wishes
Cardstock: Soft Sky & Whisper White
Ink: Soft Sky, Mint Macaron, Pool Party, Tempting Turquoise, Pacific Point, Emerald Envy, Tangerine Tango, Rich Razzleberry & Wisteria Wonder
For more colours scroll down the page.
Stamp sets: Picture Perfect, Balloon Celebration Endless Birthday Wishes & Hardwood
Cardstock: Crumb Cake, Basic Black & Whisper White
Ink: Soft Suede, Black Memento, Pool Party, Tempting Turquoise, Pacific Point, Blushing Bride, Peekaboo Peach, daffodil Delight, Sweet Sugarplum, Rich Razzleberry, Elegant Eggplant, Night of Navy, Calypso Coral, Mint Macaron, Cucumber Crush & Bermuda Bay
(It was a little while ago that I made these cards so it's tricky to remember exactly what colours I used, especially when there was sooo many)
Scroll down to bottom for more colours options
I've found Thick White Cardstock is the most suitable for weaving through the middle section. Though it can't hurt to experiment...
Stamp sets: Picture Perfect, Kinda Eclectic & Birthday Blooms
Cardstock: Sweet Sugarplum, Elegant Eggplant & Whisper White
Ink: Blushing Bride, Sweet Sugarplum, Rich Razzleberry, Elegant Eggplant, Wisteria Wonder & Sahara Sand
Scroll down to bottom for more colours options
Stamp Set: Swirly Bird & Endless Birthday Wishes
Cardstock: Peekaboo Peach, Crumb Cake, Basic Black & Very Vanilla
Ink: Peekaboo Peach, Flirty Flamingo, Pear Pizzazz, Old Olive & Black
Extras: Linen Thread
I had done a different version of this card for the class. It was Black, white & Gray using the motor bike from born to ride. I can't seem to find the card to take photo, I think Ive given it away...
Here are all (...well most) of the colours I used for stamping the birds, flowers and sponging some backgrounds. If I hadn't taken these photo during the process, I'd never remember all the colours I used. I do get a bit carried away with colour sometimes...
The background on the left is coloured with the rubber brayer while the background on the right is coloured with sponges.
Step 1
Step 2
Sometimes I would just add a bit of colour using a dauber or a sponge.
Step 3
Step 4
Step 1
Step 2
Step 3
oops... I've accidentally deleted a photo that was here... : /
Probably adding Sweet Sugarplum & Rich Razzleberry to the throat.
Step 4
Step 1
Step 2
Step 3
Step 4
Step 1
Step 2 & 3
Step 4
Experimenting with colour can be fun.
I find it easier to start with the darkest colour when triple stamping with photopolymer, then you can see through the lighter colour ink on the stamp and can line up more easily with the darker ink that's already been stamped.
Stamp Set: One Wild Ride
Cardstock: Basic Gray, Smoky Slate, Basic Black, Whisper White & Thick White
Ink: Black Memento, Basic Gray & Smoky Slate
Tools: Best Badge