I've been playing with my new stamp set Forever Young (which I love), & found the brayer is a fantastic tool to use with this stamp set. So I thought why share a few tips of how I used the brayer to acheive some of these great effects.
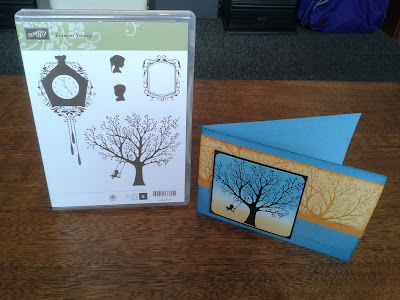 |
| Stamp set: Forever Young. Avaliable in wood mount $50.95 & Clear mount $40.95. |
 |
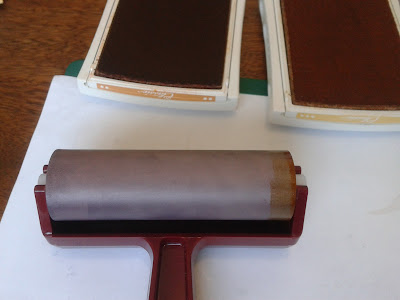
Basic Suppies: Stamp set, Brayer, Sponges, Ink pads: More Mustard, So Saffron, Marina Mist & Black,
Coloured Card stock & Glossy white Card stock, & Scrap paper. |
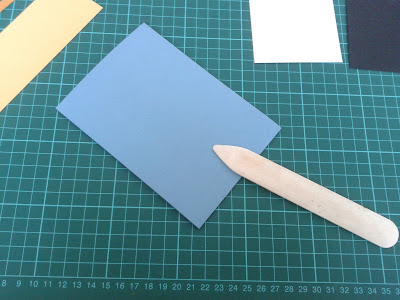 |
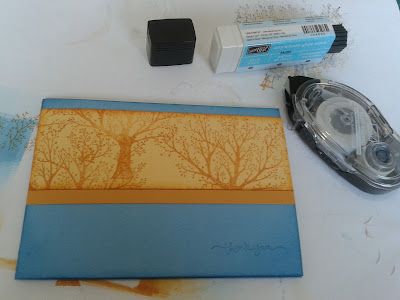
| 1. Fold card base in half & crease with bone folder. |
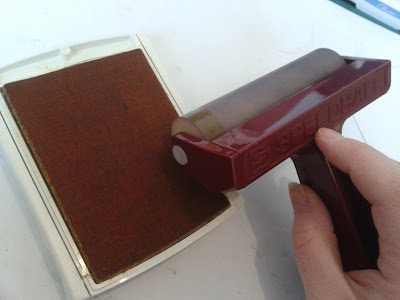 |
| 2. Ink the end of the brayer with So Saffron (approx 1"). |
 |
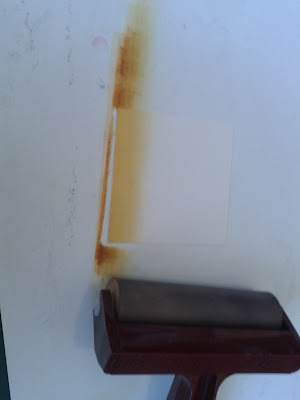
| 3. Roll onto the bottom edge of the glossy white card stock. Try to keep rolling in just one direction to avoid making marks. Also try to drag the ink upward just slightly by moving the brayer up just a tiny bit each time you roll across the card stock. |
 |
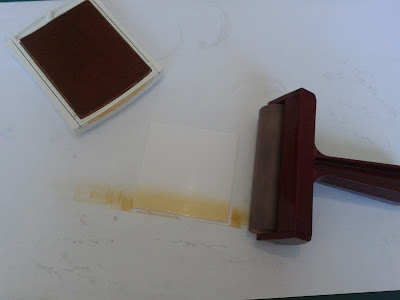
4. Re-apply the same amount of So Saffron ink to the brayer, then add a very small amount of More Mustard ink
(approx 1/4") to the very end of the brayer. |
 |
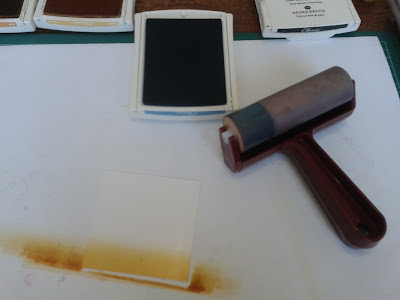
5. Roll ink onto the same area of glossy card stock that you've already inked.
This just adds intensity of colour & depth.
(The photo's gone sideways, but the yellows actually the bottom). |
 |
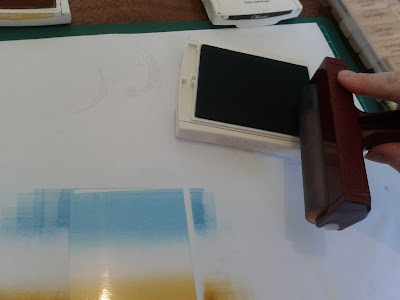
| 6. Ink up the other end of the brayer with Marina Mist, approx 1 1/2" or 2". |
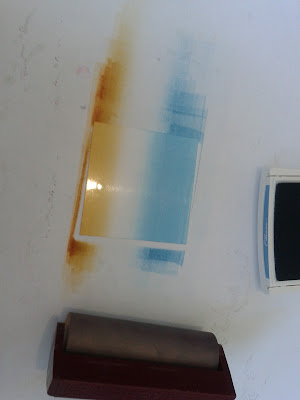 |
7. Apply the blue ink to the top edge of the glossy card stock in the same way as you applied the yellow ink. Try to drag the colour down this time, but not all the way, if the blue & yellow over lap it may turn green.
(I apologise for my photo turing side ways again) |
 |
| 8. Re-ink the brayer with Marina Mist again, but a slightly small amount this time. |
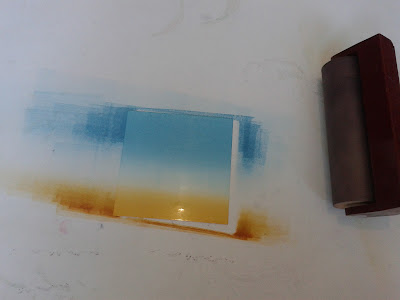 |
9. Add the Marina Mist to same area of glossy card stock as before.
But just trying to drag the blue ink down as far as possible without quite meeting the yellow.
(Allow the coloured ink to dry on the glossy card stock before stamping,
this helps to prevent the image from bleeding or going fuzzy). |
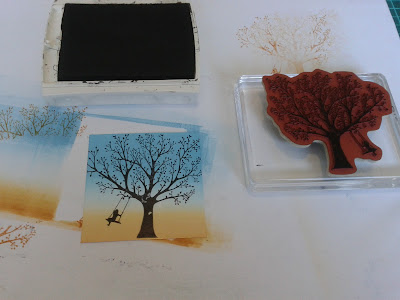 |
10. Ink the tree image with a black ink (I used stazon in the other projects), and press firmly in the middle of the block when stamping, (try to be careful not to smudge the image as glossy card stock can be slippery).
If the card stock sticks to the stamp, peel it off gently to avoid smudging. |
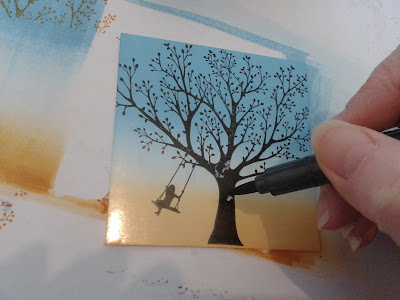 |
11. Touch up any areas of the image that have been missed, with a black stampin' marker.
(this ink may stay wet longer, blot onto clean scrap paper to help dry). |
 |
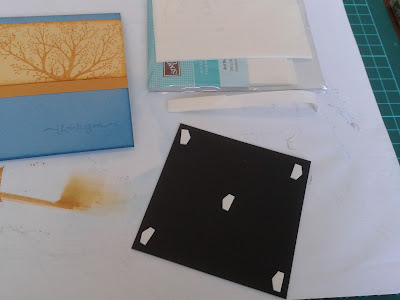
| 12. Cut corners off glossy card stock with a corner rounder punch. |
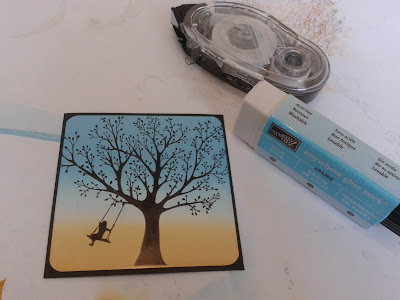 |
| 13. Stick stamped Glossy card stock onto Black card stock back ground. |
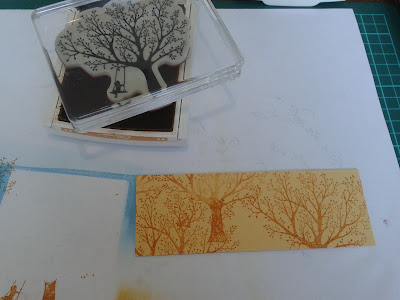 |
| 14. Stamp the tree image onto wide stripe of So Saffron, card stock in More Mustard, Ink to create a back ground. |
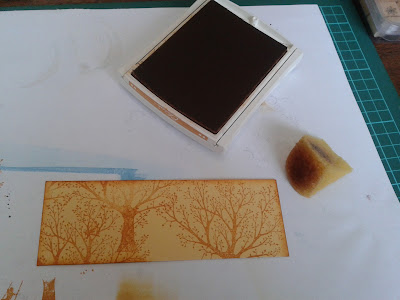 |
| 15. Sponge the edges of the So Saffron card stock with More Mustard ink. |
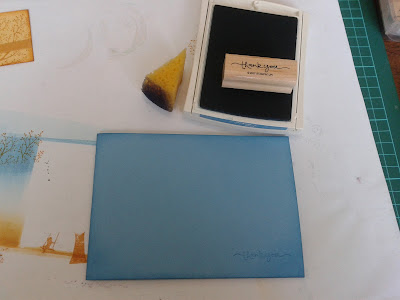 |
16. Sponge the edges of the Marina Mist card stock base, with matchig Marina Mist ink,
then stamp words or greeting in the bottom corner. |
 |
| 17. Stick the So Saffron back ground strip & thin More Mustard stips of card stock to the base of the card. |
 |
| 18. Use some dimensionals to stick the main image to the card. |
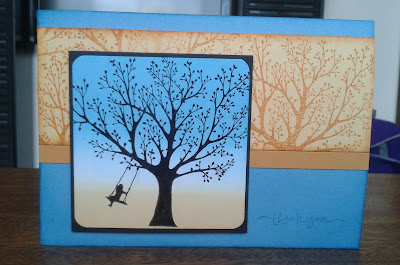 |
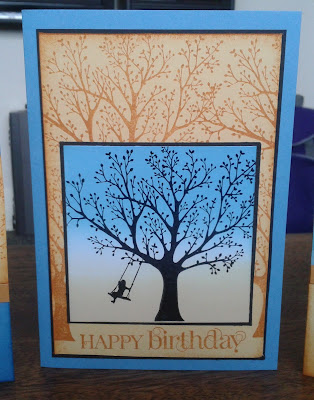
| 19. All done. & there you have a golden sun set approching the horizon, with a golden leafy tree back ground. |
 |
| Another golden afternoon. |
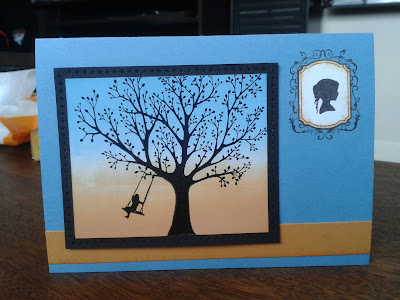 |
| Forever & a frame. |
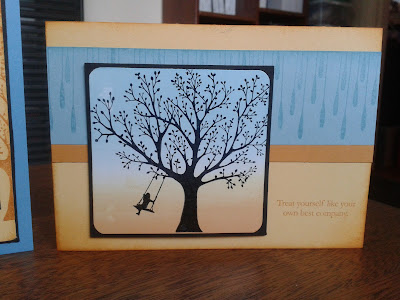 |
Sun Showers
Baja Breeze (blue) & the pendulum from the clock. |


These cards are beautiful Belinda
ReplyDeleteabsolutely beautiful. I'm going to have to go grab my brayer and have a play :)
ReplyDelete