In Colour

In Colour
2022 - 2024
Showing posts with label Silver Glimmer Paper. Show all posts

Tuesday, 7 April 2015

Pyramid Card & Stay Closed Box - for Easter treats

The most recent class I held was within the week before Easter, so of course I had to include a box for Easter eggs in the projects... & some chocolate eggs to fill them up too. Mmmm : )
Stamp Set: Chalk Talk
Card stock: Wisteria Wonder, Whisper White, Sliver Glimmer, Irresistibly Yours dsp, & Subtles  dsp Stacks
Ink: Wisteria Wonder
Framelits: Chalk Talk & Stars
Ribbon: White Jute & Silver Slim Trim
Punches: Small Star
Extras: Sliver Glitter

 Here you can see the slit in the back of the card. Tucking the corner into the slit helps the card stand up properly. Other sample I've seen have used Velcro to hold the card together.

Colours: Soft Sky, Blushing Bride, So Saffron & Wisteria Wonder
These were the projects that everyone who attended made. I gave everyone a different colour to use which I think was great, it meant we all got to see how they turned out in other colours & I'm so glad I remembered to take a photo before everyone left.

 These are the templates I draw up for everybody to refer to during the class & take home for future reference. Just in case you're wondering why my instructions are a bit vague, it's because I've already shown them how to assemble the project in the class, but know they'll need the measurements written down (I know I forget things if I don't write it down).

 I thought I'd share these pictures too, just because it's Easter. I work in a shop call Party Cupcake where we sell all sorts of cake decorating supplies, so I made some carrots for the shop window, among other chocolate treats. We sell Choc Drops in all different colours, so I thought why not put them in a plastic bag (which I sealed diagonally), tied them up, added a couple of green paper patty pans (which I cut a small hole in the centre), & tied another green ribbon around it to keep it secure.

This isn't a very good photo, I should've taken it from outside the window instead of beside it, but carrots look good on the grass. 

Saturday, 29 December 2012

Sassy Sparkling Snowflake card (step by step)

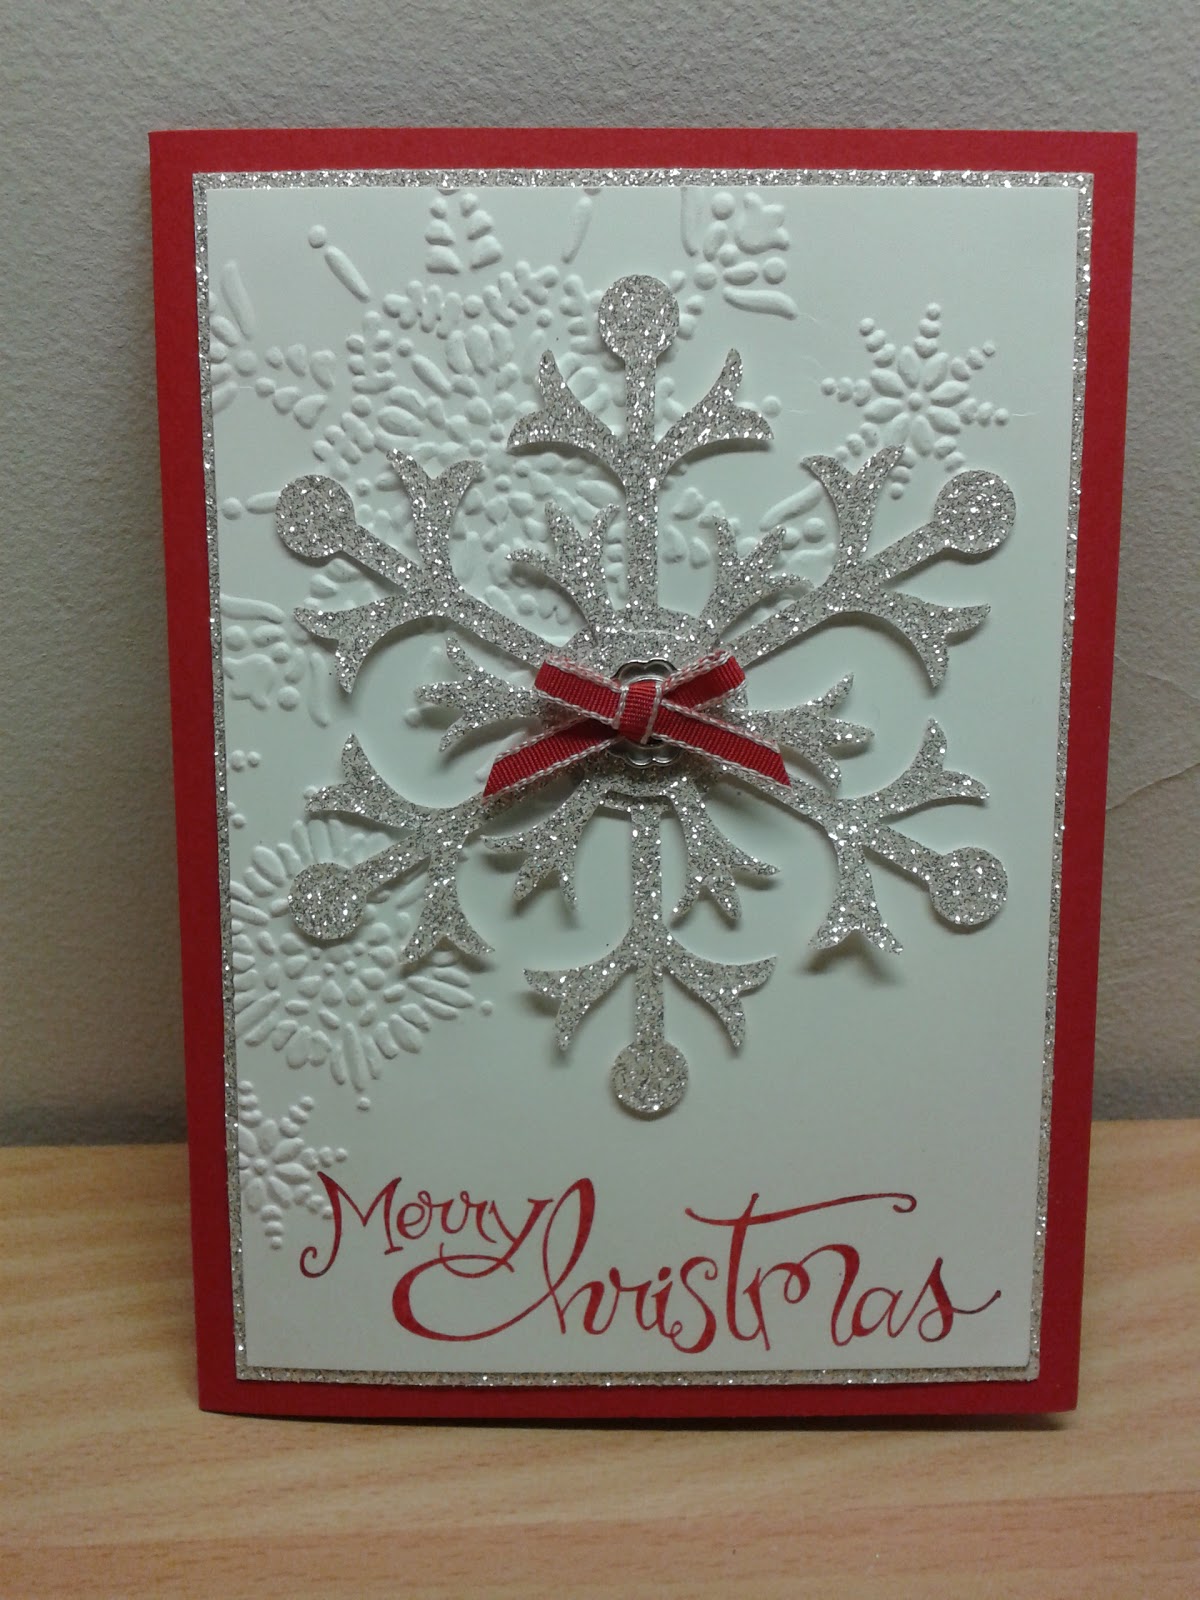
I came across a card very similar to this while googling images, and thought it was so nice must make one of my own. Of course every time I've tried to recreate something it always turns out a little bit different. I'm sorry that I can't give proper credit where credit is due. I did go looking for the original image that I found which had inspired me to make this card, however I could not find it again, therefore I can not tell you the name of the original creator. But the card was gorgeous, it was mostly white & had a champagne glimmer snowflake. So here is my take with silver & red.
Stamp set- Sassy Salutations, Embossing folder- Northern Flurry, Die- Snow Flurry
Colours- Whisper White, Real Red & Silver Glimmer paper.

The "Merry Christmas" is shiny because I've embossed it with clear embossing powder.

1. Ink up the greeting with Versa Mark ink.

2. Then dip into Real Red ink, & stamp onto whisper white card stock.

3. Sprinkle with clear embossing powder, & remove excess.

4. Use a heat tool to set the embossing powder.

The "Merry Christmas" is a nice shiny red at the bottom end of my whisper white card stock.

5. Place the card stock into the Northern Flurry Embossing  Folder,  trying not to cover the greeting with the image, but having as much of the image land on the top end of the card stock as possible.

6. Run it through the Big Shot (in the appropriate sandwich order).

The snowflakes ended up pretty close to the greeting, but didn't actually go over it. So I'm happy with that.

7. I cut my silver glimmer paper to size, then tried to cut out two snowflakes from the Snow flurry die. The idea is to waste less by using the rectangle portion as part of the background layer.

I accidentally cut this snowflake too close to the edge of my silver glimmer paper, so I needed to  repair it by cutting another piece of the snowflake to fit back in & fill the gap.
(  I apologize for some of these photos ending up sideways & up-side down )

 Once the card is put together you don't even notice, because the sparkle hides the puzzle piece look.

8. I used a glue dot to hold the repaired piece in place as I attached the sliver glimmer paper to the whisper white card stock. Then stuck the to a Real Red card base. (Glue dots are useful when  sticking pieces to glimmer paper).

9. I used glue dots to stick my snowflake together, then more glue dots to stick the snowflake to the card.

It just needs something to finish of the snowflake. (& I bet  you can't even see where my repair job ended up)

10. I thought a bit more red was need for the centre of the snowflake, & had Real Red 1/8" Taffeta Ribbon, & Ribbon  Sliders. I went with the one from my old Hodgepodge Hardware, put the ribbon through it then tied a little bow.

11. I used more glue dots to stick the ribbon & hardware to the snowflake.

All done. Shimmery & Shiny.

The Photo really doesn't do it justice. It looks much nicer in real life.
(That could be something to do with my poor photography skills & using my phone as a camera) : D

A white version. I used Naturals White card stock & a White Button.
Stamp set- Curly Cute.

I stamped the "Seasons Greetings" in Versa Mark, the Sahara Sand & embossed with Iridescent  Ice Embossing Powder.