
My Cousin Tegan is pregnant with her third child (the other two are much older now), and my auntie dearest has asked me to make the baby shower invitations. The "Nappy" style seemed to be a favourite option, and as for the "peanut"...well that's pretty much the baby's nick name so far.
Then I was asked to do a card for the baby's birth & for the shower, so I made lots for choice, but she's taken them all anyway. : )
 |
| All 30 of the Baby shower invitations done. (Instructions for the "Nappy" at the bottom of the page) |
 |
| This was the sample I made to make sure they liked it before I went ahead & made all 30. The insert was a bit small in this one so I made the others a little bit bigger, and this peanut was too big, so I made the others a little bit smaller. |
 |
| Stamp sets: Holiday Invitation, Tiny Tags & Short & Sweet Card Stock: Naturals White, Whisper White & Pool Party Ink: Coastal Cabana, Pool Party & Sahara Sand Tools: Simply Scored, Circle Punches & Corner Rounder Ribbon: Pool Party |
 |
| MDS: Top line & stars |
 |
| I don't usually make a lot of baby cards so I had to think about it, then I had to borrow some stamps too. As you can probably tell I was trying to stick to the colour theme here. |
 |
| Baby- Blocks Cards Stamp Sets: Something for Baby,Button Buddies & Back to Basics Alphabet Card Stock: Pool Party, Crumb Cake, Whisper White & Daffodil Delight Ink: Pool Party, Crumb Cake, Smoky Slate Daffodil Delight & Pumpkin Pie Punches: Square & Postage stamp Framelits: Baby's First |


 |
| There's a little spot on the bottom to write a message. |

 |
| Baby's Room- Side Step Card Stamp Sets: Something for Baby Card Stock: Pool Party, Sahara Sand, Whisper White & Daffodil Delight Ink: Pool Party, Crumb Cake, Smoky Slate Daffodil Delight & Pumpkin Pie Punches: Square & Postage stamp Framelits: Baby's First |
 |
| Spinner Card Stamp Set: Short & Sweet +Two by Two Card Stock: Crumb Cake, Pool Party, Soft Sky & Whisper White Ink: Crumb Cake, Pool Party & Memento Black Blendabilities: Soft Sky, Night of Navy, Smoky Slate, Daffodil Delight, Pumpkin Pie, Crumb Cake, Coastal Cabana, Bermuda Bay & Pink Pirouette Punches: Word Window Big Shot: Chevron Embossing Folder & Circle Framelits Extras: White Chalk Pen, Natural Chevron Ribbon & Pool Party Bakers Twine |
 |
Nappy Fold Instructions
I basically just folded a piece of regular copy paper into the nappy, punched & tweaked it a little and went from there. Then I had to come up with real measurements so I could make the other 29 the same.

Start with a sheet of A4 cardstock & cut at 8 1/4".

You Should Have an 8 1/4" x 8 1/4" square.

Cut in half Diagonally from corner to corner.

Now you can make two (unless you muck one : p )

Place the longest side of the triangle at the left edge of the score board & score at 3 1/4".

Just making sure you can see the score line : )

Turn & place the longest side at the top of the score board. Make a mark at 3 1/2" & 8 1/4".

You can use a pencil if you prefer, I just found easy enough to make the mark with the stylus.

I used my ruler to help with this score because it's on a bit of an angle & you won't be able to have the cardstock flush on any side.

Score a line between the mark at the top & the bottom score line.
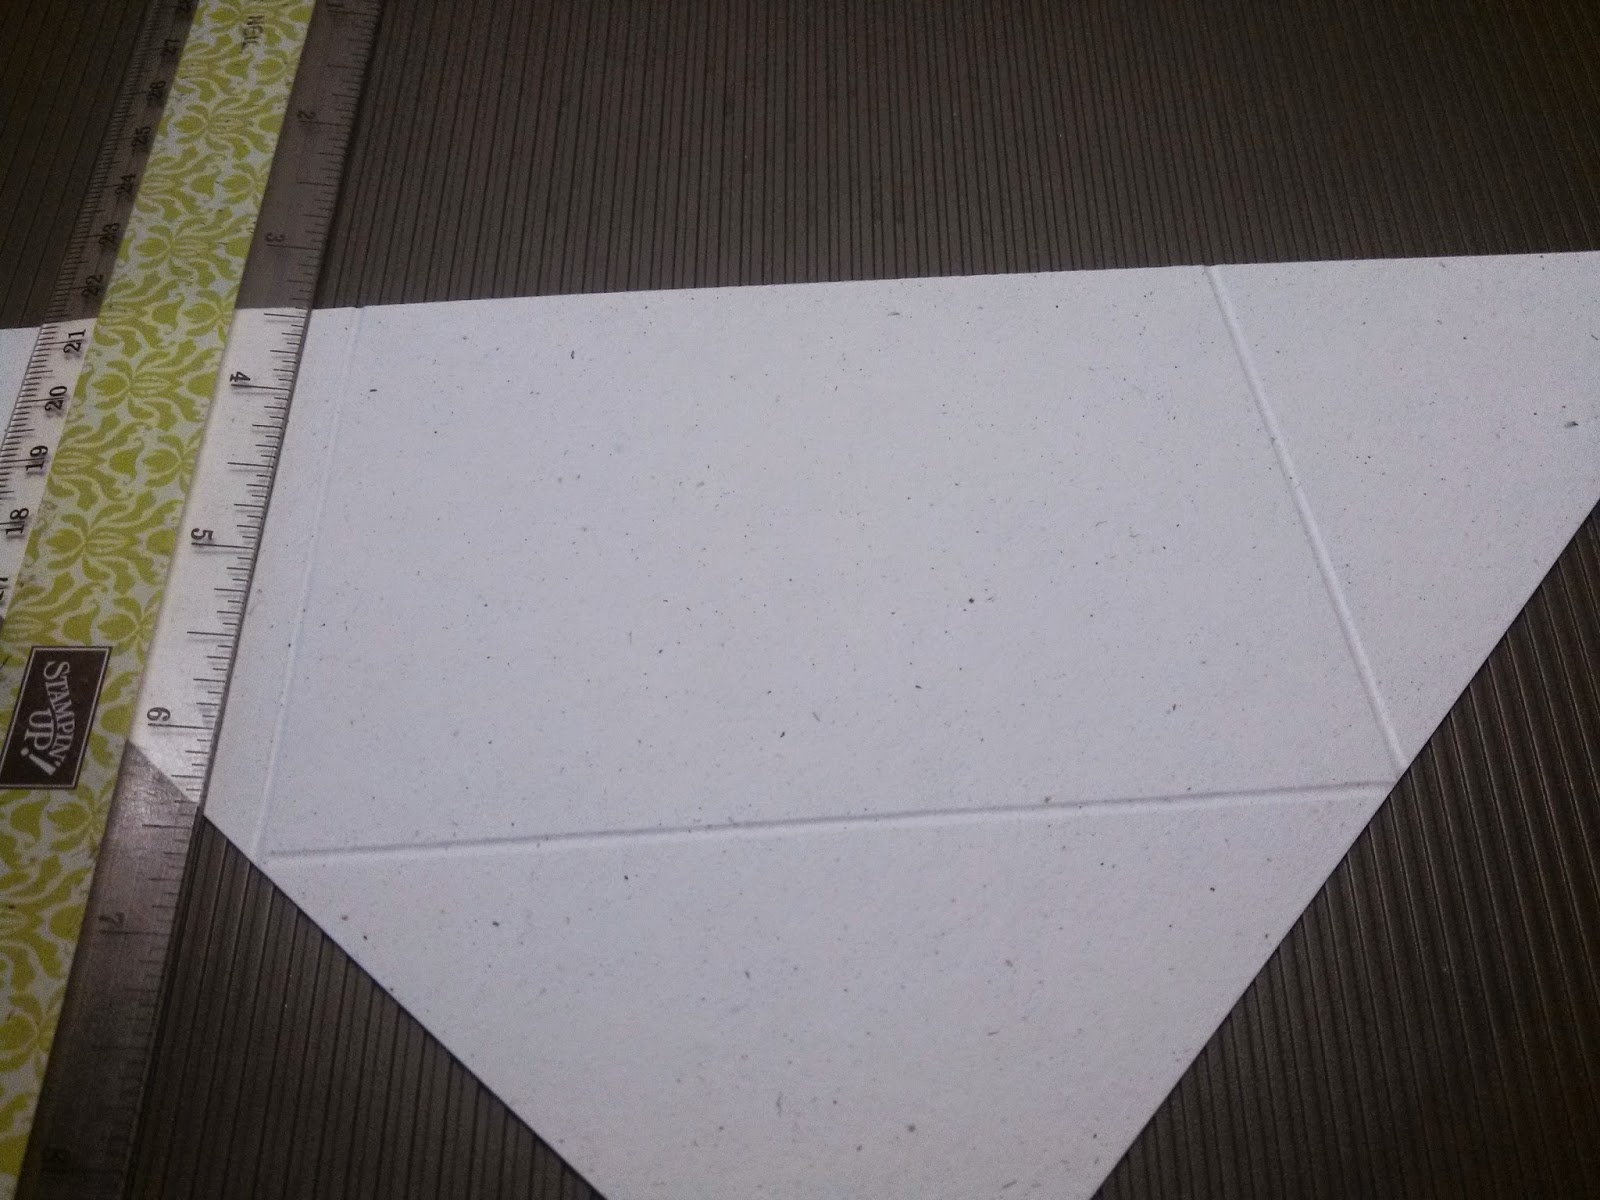
Repeat on the other side.

Place a 2 1/2" circle on the corner of the two score lines & mark with a pencil.
(It's up to you how big & where exactly you want the leg hole.)


Use the 2 1/2" circle punch to cut out the semi circle you traced.
Don't throw it away yet.

Flip it over to the other side & match up the score lines ( especially the bottom -horizontal line). This will help keep the leg holes even (trust me).


Fold all the score lines in.
You may end up with daggy leg holes like I have, but we can fix that.

Flip it over, now you can see just how much excess there is.

Use a pencil to trace over the excess using the curve from backside as your guide.

Open it back up, now you can see what needs to come off.

Just insert these excess portions back into the 2 1/2" circle punch & use the pencil mark as a guide.

Here you can see I've trimmed the excess from left side & it's much neater than the right side.

Use a corner rounder to trim all three corners.

The top two corners were a bit trickier, so I used a sanding block to smooth them over.

I used my grid mat as a guide to punch the holes for the ribbon.
The nappy is about 12cm, so between 4-5cm on the left and 7-8cm on the right.
You don't have to do this step if you're not fussy, you can just eye-ball-it.

Punch the two holes big enough to fit your ribbon through.

Lightly sponge the edges with Sahara Sand.
(it seems I had done this step punching the holes, not that it matters)

I used about 12-13cm of ribbon.

Thread the ribbon from the outside to the inside, so you have a (smooth- untwisted) strip from the hole on one to the other & both tails on the inside.

How do I explain this bit... Now thread the tail ends back through the opposite side to which it came from.

This will create a loop between the two holes with the tails of the ribbon landing on the front.

You can drag the centre piece of ribbon to help adjust & even out the tails.

Tighten the ribbon by pulling both tails outward at the same time.
Trim off any excess to tidy up.
...And that's pretty much it for the "nappy pouch fold" part of it. You could put other messages inside rather than an invitation if you like, such as congratulation & birthdays.


