In Colour

In Colour
2022 - 2024
Showing posts with label Wetlands. Show all posts

Tuesday, 7 February 2017

Sponge Brayers & Seasides

Stamp set: Wetlands
Cardstock: Whisper White, Pacific Point & Sahara Sand
Ink: Marina Mist, Pacific Point, Tempting Turquoise, Sahara Sand, Memento Black & Craft White
Extras: Linen Thread
Tools: Sponge Brayers


This was the card design I made for a technique class  using the Sponge Brayers. I must admit I wasn't too sure about the Sponge Brayers at first... but once I tried them I didn't mind the results I was getting. Then showed everyone in the class how they worked best for me and they were all very happy with the results they ended up with too. The other comments I heard during the class were; "They're easier to use than the rubber brayer" and "They're more forgiving than the rubber brayer" and " I think I'll have to order some of those"! 
So of course I had included a few more projects in later classes using the Sponge Brayers. This was to not only show the possibilities of the Sponge Brayer, it was also to help everyone get some more practice, because the more you practice the better you get.
I've noticed that when people order a product they also like seeing it used and demonstrated in classes to get more ideas on how to use it at home.

Because I ran two classes I had two demonstration cards plus my practice and sample cards, you can see from the photos below that they all turn out slightly different.


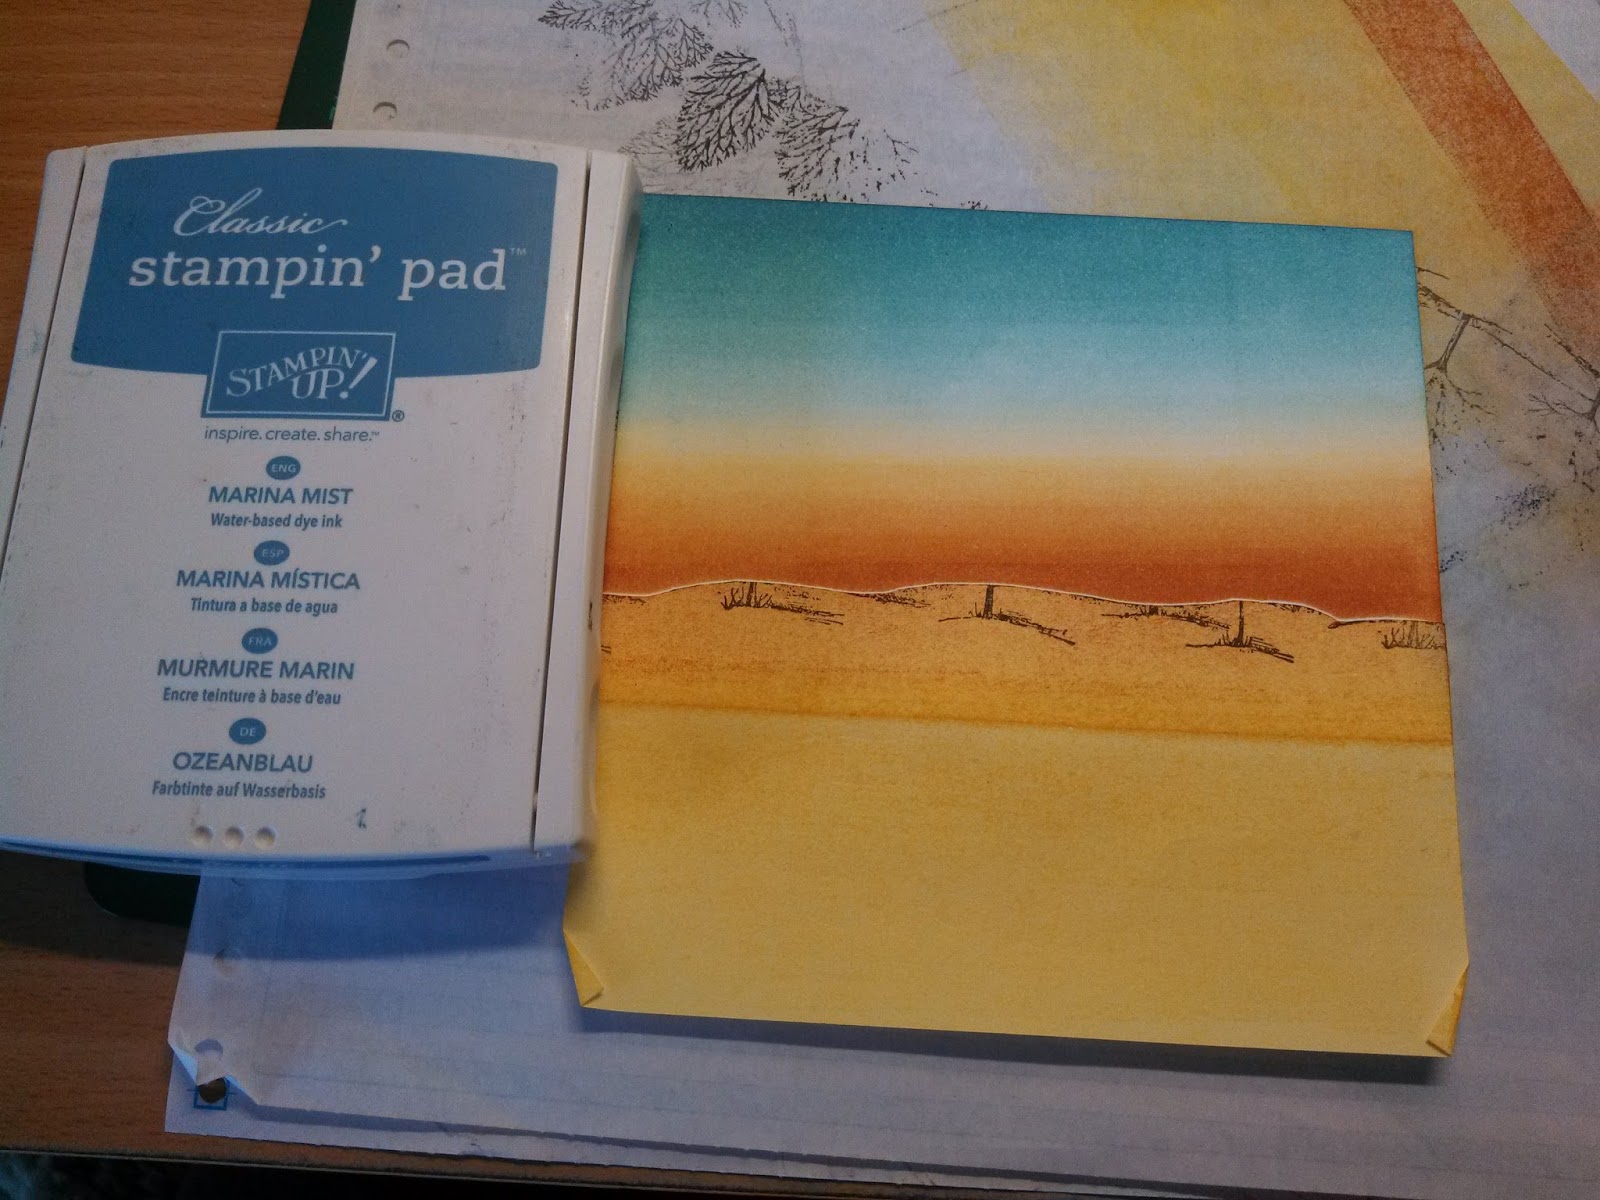
After all the ink colours have sponge brayered onto the white cardstock, you can stamp the images in black.

Either use a White Craft ink pad, or a White Chalk Pen to add some white wash and background waves.

The White Gel Pen is great for adding a bit of white to the backs of the seagulls.

What else but the Wink of Stella to add some sparkling highlights to create a shimmery shiny sea.


Monday, 31 October 2016

Woodland Embossing Folder

I had a lot of fun playing with the Woodland embossing folder and I think everyone in the class did too. The Navy Christmas card was the class project. 

Stamp sets: Lovely as a Tree & Oh What Fun
Cardstock: Whisper White, Sahara Sand & Naturals White
Ink: Garden Green, Always Artichoke, Cherry Cobbler & Sahara Sand
Tools: Rubber Brayer, Decorative Label Punch & Woodland Embossing Folder
Extras: Linen Thread
Note: The ink has been brayered onto the Woodland Embossing Folder for this card

Stamp sets: Wetlands
Cardstock: Whisper White, Smoky Slate & Sweet Sugarplum
Ink: Sweet Sugarplum, Flirty Flamingo, Peekaboo Peach, Daffodil Delight & Smoky Slate
Tools: Rubber Brayer Circle Punch & Woodland Embossing Folder
Extras: Sweet Sugarplum Ruched Ribbon

Stamp sets: Lovely as a Tree & Oh What Fun
Cardstock: Whisper White, Sahara Sand & Mossy Meadow
Ink: Marina Mist, Always Artichoke & Sahara Sand
Tools: Rubber Brayer, Circle Punch & Woodland Embossing Folder
Extras: Linen Thread
Note: The ink has been brayered onto the Woodland Embossing Folder for this card

 The next few cards almost look the same, but because this was the card we made for the class project each one I made turned out a little bit different. So I thought I would show them all anyway, just so you could see that if you want something like a moon in the background, with mistletoe/holly dangling in front of it -while hanging from a branch, then you need to think about placement a little bit before embossing.
Stamp sets: Lovely as a Tree & Oh What Fun
Cardstock: Whisper White, Marina Mist & Night of Navy
Ink: Marina Mist, Night of Navy & Dapper Denim
Tools: Rubber Brayer, Circle Punch & Woodland Embossing Folder
Extras: White Gel Pen 


Stamp sets: Lovely as a Tree & Oh What Fun
Cardstock: Whisper White, Marina Mist & Night of Navy
Ink: Marina Mist, Night of Navy & Dapper Denim
Tools: Rubber Brayer, Circle Punch & Woodland Embossing Folder
Extras: White Gel Pen 

Stamp sets: Lovely as a Tree & Oh What Fun
Cardstock: Whisper White, Marina Mist & Night of Navy
Ink: Marina Mist, Night of Navy & Dapper Denim
Tools: Rubber Brayer, Circle Punch & Woodland Embossing Folder
Extras: White Gel Pen 

Stamp sets: Lovely as a Tree & Oh What Fun
Cardstock: Whisper White, Wisteria Wonder, & Night of Navy
Ink: Marina Mist, Night of Navy, Wisteria Wonder & Dapper Denim
Tools: Rubber Brayer, Circle Punch & Woodland Embossing Folder
Extras: White Gel Pen & Staple


Stamp sets: Lovely as a Tree & Wetlands
Cardstock: Whisper White, Basic Black & Always Artichoke
Ink: Daffodil Delight, Cajun Craze, Soft Sky, Marina Mist, Pacific Point, Always Artichoke, Memento & Tip Top Taupe 
Tools: Rubber Brayer & Woodland Embossing Folder

Make a mask by stamping the row of trees on a sticky-note and cutting along the horizon. 
Place the mask on the bottom of a piece of Whisper White Cardstock, leaving enough room at the bottom for some green ground.


Add some Daffodil Delight ink to the Brayer (you only need to ink up about half way across). Then apply in one direction rolling all the way across the page and working your way gradually so the colour fades as the ink runs out. (This can take some practice if you're new at it - just keep rolling)

Next add some Cajun Craze ink to the brayer, you wont need much, probably about an inch across the brayer. Repeat the first step of rolling, but try to keep most of the colour concentrated on the horizon. The trick is don't add to much ink to the brayer to begin with, remember you can always add more... 

I just used a wet wipe to remove the left over Cajun Craze ink from the brayer.
I don't want the darker colour to stain the lighter coloured ink pad.


Apply another layer of Daffodil Delight to help get a nicer blend.

Clean all the orange and yellow inks off the brayer before changing colour.

Apply Soft Sky ink along the top of the sky working your way down towards the horizon.
Try not to overlap these colours to much or it might start to look a little green.

Add some Marina Mist to the sky but don't take it down quite all the way.

Sometimes when I'm adding a few colours to one area to achieve a graduation of tone, I'll add the colours in layers on the brayer, starting with the lightest to darkest.

Pacific Point is the darkest of the blues here, but there is only small amount at the top, then it blends into the other blues.

Remove the mask.

Put the opposite side of the mask on, to cover the sky this time.

Use the brayer to apply plenty of Always Artichoke ink to the ground.

Remove the mask.

Use Memento Black ink to stamp the row of trees onto the Woodland embossing folder.
Stamp onto the side with the Sizzix and Stampin' Up! logos on it, so that the stamped trees will land behind the embossed trees.


Position the brayered cardstock inside the Woodland embossing folder. If you have the stamped side up you will be able to see through the folder and line up the stamped trees with brayered horizon.


Run it through the Big Shot with appropriate plates.

Ink up the Brayer with Tip Top Taupe and very gently roll over the embossed trees. You may need to repeat this step quite a few times, but take it easy or the ink will end up all over the background too.  

You can always use a marker in the coordinating colour to touch up any bits the brayer can not reach. 


I decided to fill in all the extra little bits of the trees with a Marker so you couldn't see the background through them.


Wednesday, 11 February 2015

Warragul Party Time & Sponging Scenes

Wow! It's been and gone now, I can't believe how nervous I was...This was the first time I've presented on stage, and I tell what... sometimes I can get nervous with only 6-12 people, but there was 100 people at the Warragul Stampin' Up! Party Time Event, so yeah... just a few butterflies for most of the day. : p

Everyone had to make their own name tag, you can see mine below. However this was not the first one I had made. The first one I made was very basic; a small oval with a sponged sunset, some silhouette flowers stamped in black & my name. I looked at it and thought... I can do better than that... and would you believe it... I won! There was another lady who also won, but silly me didn't get a photo of her name tag.
The other cute little tag was made by one of the demonstrator helpers. All helpers wore one on the day (including Aaron & Amanda).
Stamp sets: Back to Basics Alphabet & From the Herd - Cheerful Critters
Card stock: Pool Party & Whisper White - Tangelo Twist, Hello Honey, Island Indigo & Whisper White
Ink: So Saffron, Pool Party & Memento Black - Black
Blendabilities: Crumb Cake, Ivory, Blush, Nude, Smoky Slate, Daffodil Delight, Pumpkin Pie & Coastal Cabana - Daffodil Delight & Blush
Tools: Oval Framelits - Word Window Punch
This was the prize I received for being one of the winners in the name tag challenge.
Plus the goodies inside the bag, (which I forgot to take a photo of) that consisted of ribbons & pegs & things.
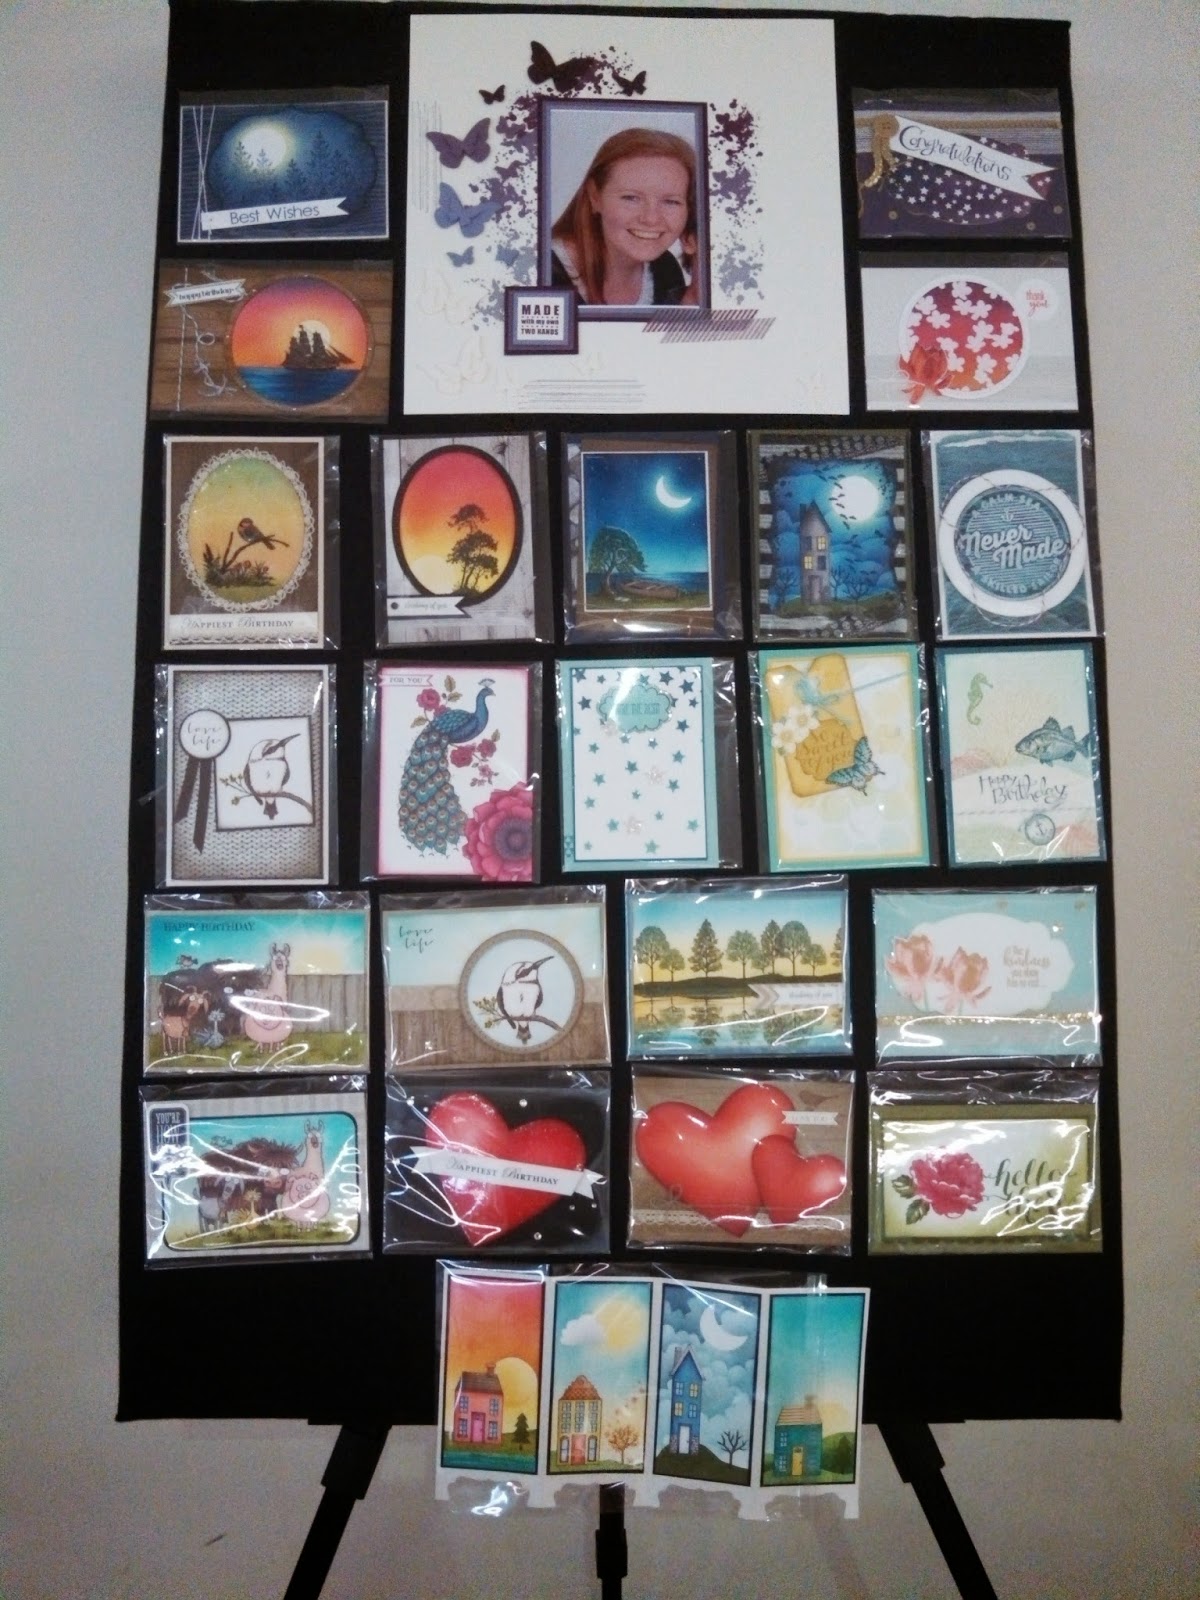
My display board
Yeah, I know the card at the bottom is crooked -but it wouldn't fit in the bag.

My presentation was about sponging. So I was going to show everything I could think of that you can do with a sponge and card stock, but I only had 5 minutes. How much sponging do you think I could fit into 5 minutes? Not nearly as much as I thought... after my first practice run I couldn't even get the scene finished : (
So then we just started eliminating as much as possible, and stuck with three main things; Sponging the scene, Two Tone Stamping (I don't even know if that's what it's really called ) and the Block Background.
Below is a finished sample of the scene I demonstrated (not the one I sponged on stage, but showed).
Stamp Set: Wetlands
Card stock: Whisper White & Lost Lagoon
Ink: So Saffron, Daffodil Delight, Marina Mist, Pacific Point, Lost Lagoon, Island Indigo, Mossy Meadow & Memento Black
Blendabilities: Bermuda Bay, Pumpkin Pie, Crumb Cake, Ivory & Colour Lifter
Extras: White Chalk Pen
Techniques: Sponging & Masking (post-it notes & circle Punch)

There were a few people who missed my presentation, & others who wanted to know if I had a tutorial for it. Well I do now.

Ink colours used for sponging: So Saffron Daffodil Delight, Marina Mist, Pacific Point, Mossy Meadow, Lost Lagoon & Island Indigo.
This video is "sponging the scene".

This is the sample from the video, as you can see it's a bit different to the card above, but no two sponged scenes will look the same, they'll all be a little bit different.


This video shows the duck being coloured with blendabilites

This is a video of stamping the reflection


Stamp Set: Wetlands
Card stock: Very Vanilla, Pacific Point & Mossy Meadow
Ink: So Saffron, Daffodil Delight, Soft Sky,  Marina Mist, Pacific Point,  Island Indigo, Mossy Meadow, Craft White & Memento BlackExtras: White Chalk Pen 
Techniques: Sponging & Masking (post-it notes & circle Punch)

Framelits: Four Feathers


Stamp Sets: Lovely as a tree & Back to Basics Alphabet
Card stock: Whisper White, Night of Navy & Naturals White
Ink: Daffodil Delight, Night of Navy & Craft White
Tools: Circle Punch Woodgrain Embossing Folder & Labels Collection Framelits
Techniques: Embossing, Sponging & masking

Stamp Set: Lovely as a Tree & Moon Lake
Card stock: Whisper White, Marina Mist & Crumb Cake
Ink: So Saffron, Crushed Curry, Marina Mist, Soft Sky, Mossy Meadow & Memento Black
Blendabilities: Old Olive & Wild Wasabi
Extras: White Chalk Pen & Natural Chevron Ribbon
Techniques: Reflection, Sponging & Masking 
This next card was one of my favourites, though I did try it a couple of different ways before hand (stormy, gray & cloudy), but this one turned out the best. How could I resist sponging a moon over the lake when the stamp set is called "Moon Lake".
Stamp Set: Moon Lake
Card stock: Whisper White, Backed Brown sugar, Adventure Bound dsp & Night of Navy
Ink: So Saffron,  Marina Mist, Pacific Point, Night of Navy, Old Olive & Memento Black
Blendabilities: Old Olive, Wild Wasabi, Crumb Cake, Smoky Slate, Night of Navy & Colour Lifter
Extras: White Chalk Pen & Linen Thread
Techniques: Piercing Sponging & Masking

Stamp set: From the Herd
Card stock: Whisper White & Sahara Sand
Ink: Old Olive, So Saffron, Daffodil Delight, Pool Party, Bermuda Bay, Sahara Sand & Memento Black
Beldabilities: Crumb Cake, Ivory, Nude, Natural, Blush, Pink Pirouette, Basic Gray, Soft Sky, Daffodil Delight, Old Olive, Pumpkin Pie & Colour Lifter


Stamp set: From the Herd & Just Sayin'
Card stock: Whisper White, Basic Black & Adventure Bound -dsp
Ink: Old Olive, Soft Sky Tempting Turquoise, Pool Party, & Memento Black
Beldabilities: Crumb Cake, Mocha, Bronze, Ivory, Nude, Natural, Blush, Pink Pirouette, Basic Gray, Daffodil Delight, Old Olive, Pumpkin Pie Coastal Cabana & Colour Lifter

Stamp Sets: Moon Lake & Apothecary Accents 
Card stock: Very Vanilla, Naturals Ivory & Soft Suede
Ink: Old Olive, Crisp Cantaloupe, So Saffron, Pool Party, Soft Suede, Early Espresso & Memento Black
Blendabilities: Crumb Cake, Old Olive, Wild Wasabi, Bermuda Bay Calypso Coral, Wisteria wonder
Extras: Oval Framelits, Embossing Powder & Venetian Crochet Trim
Techniques: Sponging & Cracked Glass


Stamp Sets: Serene Silhouettes & Moon Lake
Card Stock: Basic Black, Whisper White & Adventure Bound dsp
Ink: Memento Black, So Saffron, Crushed Curry, Pumpkin Pie, Calypso Coral & Rose Red
Extras: Oval Framelits & White Jute Ribbon
Techniques: Piercing, Sponging & Masking

Stamp Sets: The Open Sea & Itty Bitty Banners
Card Stock: Whisper White & Baked Brown Sugar
Ink: Early Espresso, Soft Suede, Basic Gray,  Marina Mist, Pacific Point, Night of Navy, So Saffron, Crisp Cantaloupe, Tangelo Twist, Calypso Coral, Melon Mambo, Wisteria Wonder & Memento Black
Blendabilities: Smoky slate, Night of navy
Framelits: Circles & Itty Bitty Banners
Extras: Bakers Tine & Mini Brads
Techniques: Sponging & Masking


I Think I had mother's Day in mind when I made the card below. I was thinking of a feminine tattoo collage... not sure if that's what it looks like to anyone else though.
Stamp sets: Back to Basics Alphabet, Perfect Peacock, Blended Bloom, Everything Eleanor & Papillon Potpourri 
Card Stock: Very Vanilla, Whisper White & Basic Black
Ink: Crumb Cake, Island Indigo, Memento Black, Real Red, Calypso coral & Blushing Bride
Blendabilities: Coastal Cabana, Night of Navy, Daffodil Delight, Cherry Cobbler, Pumpkin Pie, Calypso Coral, Melon Mambo, Rich Razzleberry  & Wisteria Wonder
Framelits: Hearts
Technique: Sponging

Stamp Sets: Everything Eleanor & Apothecary Accents
Card stock: Basic Black & Whisper White
Ink: Craft White, Memento Black, Rose Red, Melon Mambo & Pink Pirouette 
Extras: Heart Framelits, Rhinestone Jewels, Crystal Effects & Dazzling Diamonds
Technique: Sponging


Stamp Sets: Everything Eleanor, Itty Bitty Banners & Woodgrain
Card stock: Very Vanilla & Crumb Cake


Ink: Memento Black, Crumb Cake, Soft Suede, Real Red, Calypso Coral & Blushing Bride 

Framelits: Heart & Itty Bitty Banners, 

Ribbon: Burlap, Venetian Crochet Trim & Linen Thread
Technique: Sponging

Stamp set: Just Sayin'
Card stock: Whisper White, Pool Party & Island Indigo + Silver Glimmer paper
Ink:  Pool Party & Island Indigo
Extras: Word Bubbles Framelits, Silver Glitter Washi Tape & Decorative Mask -Stars

Techniques: Masking & Sponging (Duabers)


Stamp Set: A Happy Thing
Card Stock: Whisper White, Early Espresso & Naturals White
Ink: Early Espresso
Blendabilities: Crumb Cake, Ivory, Colour lifter, Old Olive & Daffodil Delight
Extras: Circle Punches & Espresso Ribbon


Stamp Sets: A Happy Thing & From The Herd
Card stock: Crumb Cake & Whisper White
Ink: Pool Party, Soft Sky, Daffodil Delight, Soft Suede, Crumb Cake & Memento Black
Blendabilities:  Crumb Cake, Ivory, Colour lifter, Old Olive & Daffodil Delight
Framelits: Circles

Robbon: Natural Chevron & Linen Thread

Stamp Set: Adventure Awaits
Card stock: Naturals White, Whisper White & Adventure Bound dsp
Ink: Craft White
Embossing Powder: White
Extras: Circle Framelits & Bakers Twine

Stamp Sets: Perfect Peacock, Blended Bloom & Itty Bitty Banners
Card Stock: Whisper White & Basic Black
Ink: Memento Balck & Melon Mambo
Blendabilities: Coastal Cabana, Night of Navy, Wisteria Wonder, Rich Razzleberry, Melon Mambo, Daffodil Delight, Pumpkin Pie & Old Olive
Framelits: Itty Bitty Banners

The next two samples are using a technique I demonstrated in my presentation, I'm not sure what else to call it, I've just called it "block background", maybe "multi coloured block background" might be more accurate.
I had seen a U-tube video of a very similar thing by Lyn Faye ( I think), though she had used ink pads, markers & ink refills, everything but sponges & daubers... which was my topic, so that's how this happened.
I will attempt to do a tutorial for technique soon... so hang in there!

Stamp Sets: By the Tide & From the Herd
Card Stock: Naturals White, Lost Lagoon, Pool Party & Whisper white
Ink: Pool Party, Coastal Cabana, Island Indigo, Lost Lagoon & Mossy Meadow
Extras: White Jute Ribbon
Techniques: Tearing, Masking, sponging & Block Background
For more on the acrylic block background technique.
Stamp Set: Lotus Blossom
Card Stock: Natural White, Whisper White Crisp Cantaloupe & Crumb Cake
Ink: Craft White, Soft Suede, Blushing Bride, Crisp Cantaloupe, Calypso Coral & Rose Red
Ribbon: Burlap & Natural Chevron 
Extras: Gold Metal Button & Labels Collection Framelits
Stamp set: Lotus Blossom
Card Stock: Soft Sky & Whisper White
Ink: Blushing Bride, Crisp Cantaloupe, Pistachio Pudding & Wild Wsabi 
Ribbon: Whit Jute & Gold Sequin Trim
Framelits: Apothecary Accents
Extras: Gold Embossing Powder

Stamp Set: Lotus Blossom
Card Stock: Naturals White, Whisper White & Irresistibly Yours dsp
Ink: Tangerine Tango, Strawberry Slush & Rich Razzleberry
Tools: Circle Framelits & Circle Punch
Ribbon: White Jute & Bakers Twine

Stamp Set: Sassy Salutations
Card Stock: Elegant Eggplant, Whisper White & Irresistibly Yours dsp
Ink: Night Of Navy, Elegant Eggplant & Rich Razzleberry
Ribbon: Whit Jute & Gold Sequin Trim
Extras: Gold Metal Button & Apothecary Accents Framelits

Look... I got a photo with Aaron

...and Amanda too

Taking some fun photos in the "Party Time" frame.
Shari & me.

Katie & me.
Love this picture... so funny!
Katie, Shari & me.


All presenters, Organizers & Helper of the day.

This was the lovely Hand made gift & card that we all received.

Inside the box there was a lovely decorated note book, pen & pencil.

There was even envelopes inside the book cover.
Unfortunately I had taken photos of the other presenters boards before they had added their extra samples they'd showed on stage.

Tracey's display Board.

Brenda's Display & board.

Tania & Annemieke's display board.

Shelly & Katie's "Project Life" display .

Jacinta's display board.

Teresa's display board.

"Party Time" display samples.

There were beautiful displays every where, even in the little back room tucked around the corner.


Big Shot's & Punch Board's all set up for make & take projects.


....and of course the Ronald McDonald card donation drop box.
What a great day. 
Looking forward to convention on the Gold Coast! Yay!